The thought of making your first enamel pin can be pretty overwhelming! But, it's actually a lot less daunting than you think. Yes, there are a lot of options to choose from, but this guide will help you understand the process, how to design and order, and how to save some money!
Understanding How Pins are Made
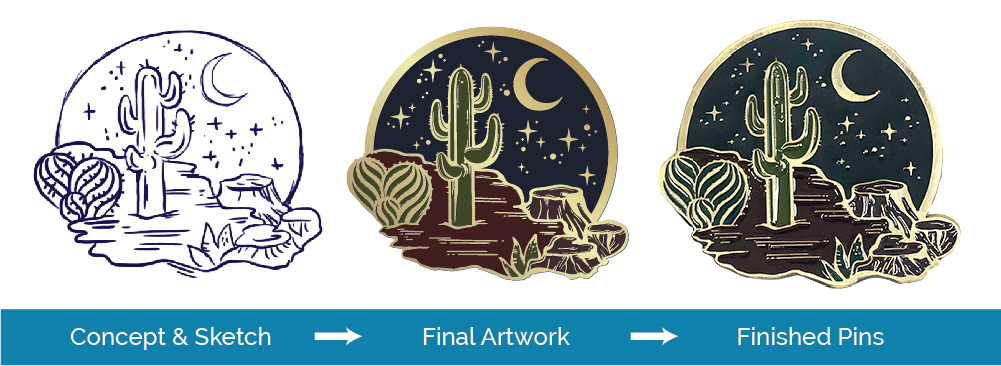
Understanding the pin-making process can actually help you design a better pin. Pins are hand-made and have certain limitations when it comes to the size and shape of the metal, and the level of detail.
First, a metal mold is made from your artwork. A vector file is used to precisely cut into a metal block to create a master mold for your pin design. We will create the vector version of your artwork for you if you don't have vector art available. The mold will then be stamped into a sheet of metal. Then each individual pin is cut out from the sheet with a die customized for your pin's unique shape. If your pin design has a complex outline or a hole that needs to be cut out, it will be cast in zinc instead.
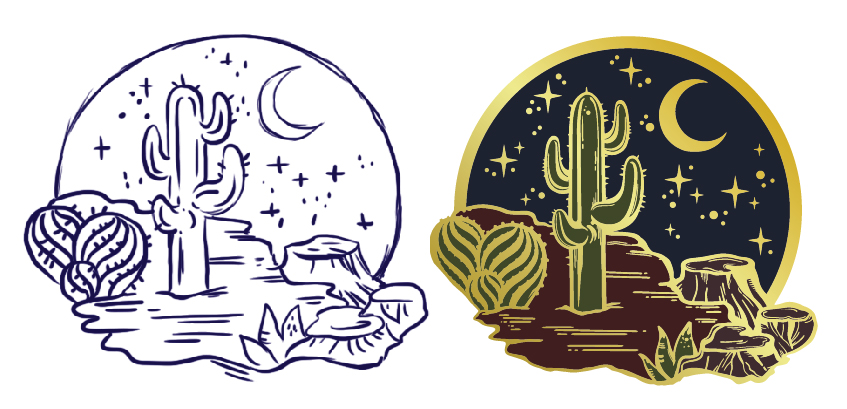
 Whether your mold is stamped in metal or cast in zinc, both processes create areas of metal that are raised, and areas that are recessed on your pin. Think of each recessed area as an empty pool that can be filled, and the raised lines are the walls of the pools. Each color needs to be completely surrounded by metal to hold the enamel, which is liquid until it is hardened in an oven. This is very important to keep in mind when designing your pin. If there is a gap in the metal, then we won't be able to fill it in with color.
 Enamel is filled in by hand with small syringes, or less commonly with a machine, depending on the design. Areas that are a small fraction of a millimeter are typically too small to be filled in cleanly. However, raised lines can be as thin as 0.1 mm.
Pins are then plated with the metal finish of your choice. This involves soaking the pins in a solution that causes a chemical reaction with the metal. The pins are then washed and individually packaged.
What Makes a good pin design?
You may have a design in mind for your first pin, but will the idea translate well into pin form?
Creating art that will be viewed on a flat surface or on a screen is much different from designing a pin that will be turned into metal and filled with enamel. If you are adapting an existing design into pin form, it can sometimes be necessary to remove certain details and simplify colors. Combining similar colors to reduce the total color count will save you money as well. Most successful pin designs are somewhat simple, yet have a strong idea.
The size of your pin is a very important consideration. The average pin is about 1" at its largest dimension.
While it's possible to make very small pins, or even very large ones, size usually comes down to your design. Larger pins are very eye-catching, but they can be impractical to wear. Smaller pins can also be appealing, but they need to be simple to work well.
Does your pin design have text? Make sure that it's large enough to be legible, especially if your pin is on the smaller side. Try printing out your pin at full size to see how it will look at various sizes.
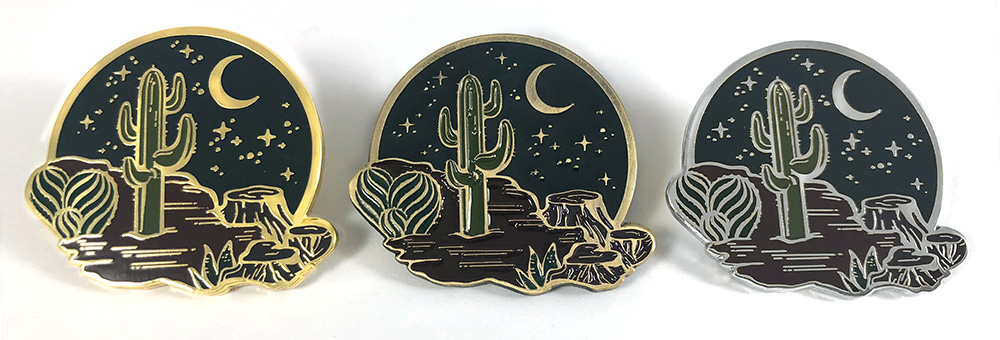 Notice how different the same design can look when it is made with different materials and finishes.
We offer the first 6 enamel colors for free. Your metal plating color doesn't count as a enamel color, but it does need to work well with your design. Make sure you pick a metal color with enough contrast for your enamel colors. For instance, some yellow enamel colors might not stand out as well against gold metal as it would black or silver.
Need a large amount of contrast? On soft enamel pins, we can paint the metal any custom color that you need!
What kind of files do you need?
We offer free artwork setup, meaning we can accept any kind of file you have, even if it's a sketch! If you have a vector format file, such as Illustrator, Corel Draw, EPS, or SVG, make sure to send that. We can also easily work with Photoshop files. If you only have a .jpg of your design, that's ok too! Just send us the highest resolution file you have. We will take care of the rest for you. Make sure to let us know how many colors you'd like and where they appear on your pin. If you have PMS colors for us to match, send those over too!
You have your design, what comes next?
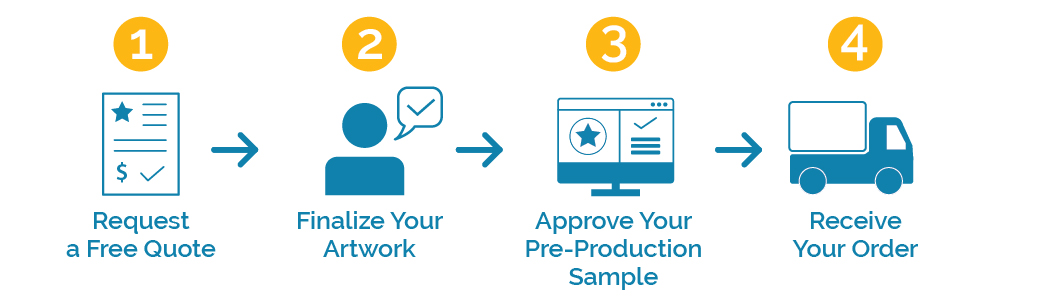
Once you have your design ready, the next step is to get a quote for your pins. One of our sales representatives will contact you, and you can adjust your specs with them as needed. One of our artists will review your design and check to make sure everything will work well as a pin. If anything needs to be changed, your artist will work with you to ensure the best results. The most common issues are metal that isn't connected, or the design having too small of a space to fill with enamel.
Once your design is all set, we will move into full production of your pin. Orders typically take 3-4 weeks to complete. Orders that are very complex will usually be closer to 4 weeks. Special options such as rainbow plating can also add on to this production time. It's always a good idea to give yourself plenty of time for your pins to be made if you need them for a specific event. Due to the labor and complexity of the pin-making process, it is very difficult to rush pin orders.
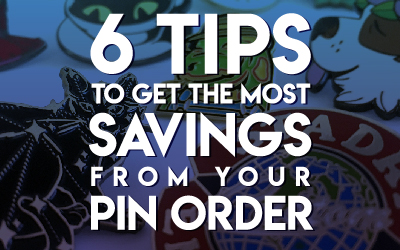
What can you do to keep costs down?
There are a few things you can do to make sure that your pin order is as affordable as possible. The two biggest factors in your pins' pricing are the size and quantity. If you order more pins, the price per pin will drop significantly. We can make as few as 25 pins per design, but ordering 50 will drop the price per pin. If you think you will need more pins in the future, it's more economical to order more at once.
As the size of the pin goes up, so will the price.
Our pins come with the first 6 enamel colors included in the base price. If your design has more than 6 colors, it's an additional 20 cents per extra color per pin. You can combine similar colors to get the total color count down and lower the price per piece.
Customizing Your Pin
There are a few ways to personalize your pin design and make it exactly how you'd like. Different options will give you a completely different finished look. First, let's go over the processes you can choose from:
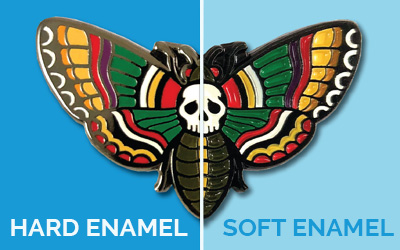
Soft Enamel Pins
Soft enamel pins have recessed areas of color. The enamel is filled just enough to color the recessed area. The result is a pin that has raised metal edges and lines. This is a popular pin type because of textured feel and classic look. If you want rainbow metal plating or a custom painted metal color then soft enamel is your only option. We can add a clear epoxy coating to soft enamel pins to make the surface flat and shiny, or you can keep the raised metal look. Most people opt for the latter.
Hard Enamel Pins
Hard enamel pins are smooth and flat. When the enamel is filled in, it is filled above the metal lines. When all of the colors are filled, the entire pin's face is ground down to be flat. Because of this, painted metal and rainbow metal finishes are not possible, because the finish would be ruined in the grinding process. Hard enamel is typically more durable and scratch-resistant compared to soft enamel. Since they are the same price when you order with us, the choice between hard and soft enamel usually comes down to personal preference.
Die struck Pins
Die struck pins give the appearance of the design being carved into the metal. The raised metal surfaces of the pins are then polished to a luster finish while recessed areas are left with a sandblasted look. The end result is an elegant and impressive "tone on tone" creation.
Printed
Printed pins are the perfect alternative when the enamel fill process is not compatible with the pin design. This typically applies to designs that have gradients of color, a very large amount of colors, or extremely small details that cannot be simplified in an ideal way.
You can also add various special options, such as glitter, rhinestones, or even a back stamp with your logo or website on it. You can also get different color variations of your pin in the same order, as long as the mold stays the same. You can check out the full selection of our special options and their prices on our quote page.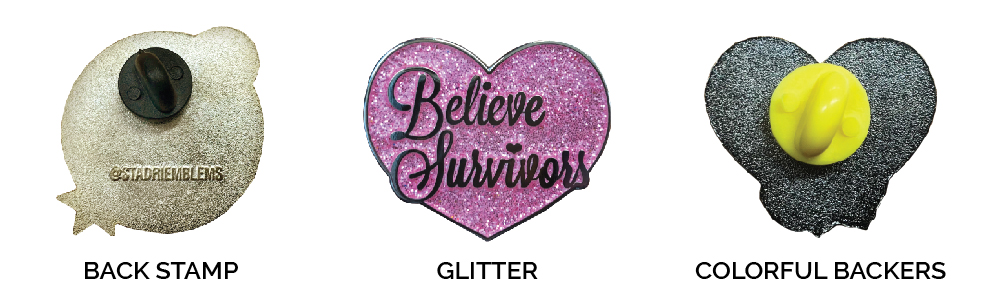
Ready to Get Started?
Get a free quote on our website to start the pin-making process. If you have any questions at all, let us know! We can advise you on what process, size, and options would be best for your pin design.