So, you have decided that you finally want to make your own embroidered patches. That's great! Whether you are an artist or designer who wants to see your work in thread form, an event organizer looking to make patches for your upcoming event, or if you need patches for your business or organization, we can help! With over 40 years in the business, we know just what it takes to produce amazing patches.
This guide will help you through the process. From coming up with a concept to receiving your final product, we will guide you step-by-step. First, let’s take a look at some of the different options you can choose from.
Introduction to Patch Options
Embroidery Percentage
Your patch’s embroidery percentage refers to the amount of your patch that is covered with thread. A patch is embroidered on to a fabric called “twill.” A patch with less than 100% embroidery will still have some of its twill showing.
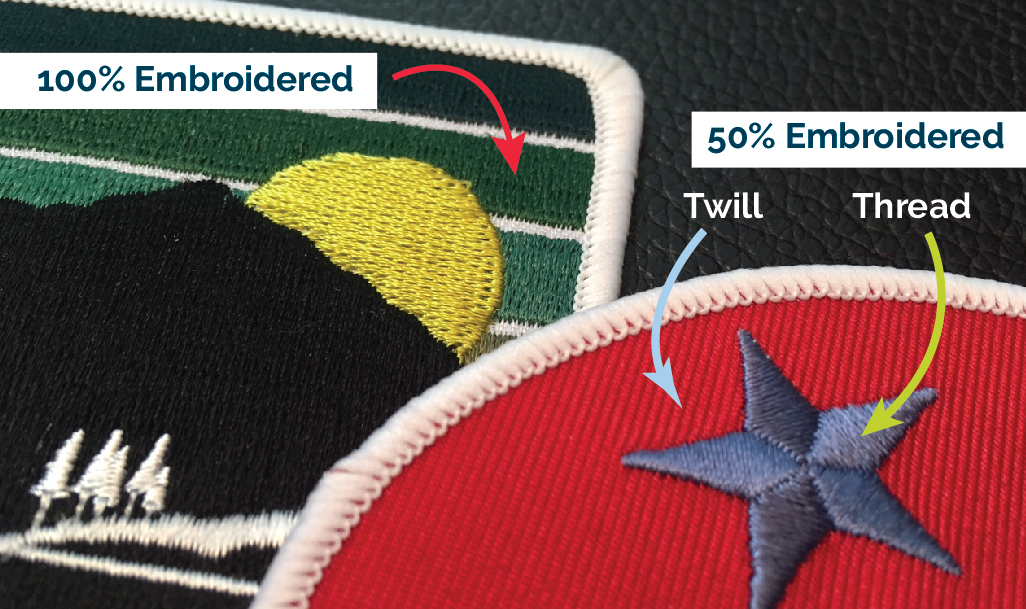
Patches up to 99% embroidery will be a little cheaper than ones that are 100%. When making the choice between these options, consider your design first. When twill is visible, it’s usually used as the ‘background’ color. If your design has a solid background color, then less than 100% might be a good option for you. Or maybe you prefer the look of a 100% embroidered patch. It's up to you!
Patch Border Options
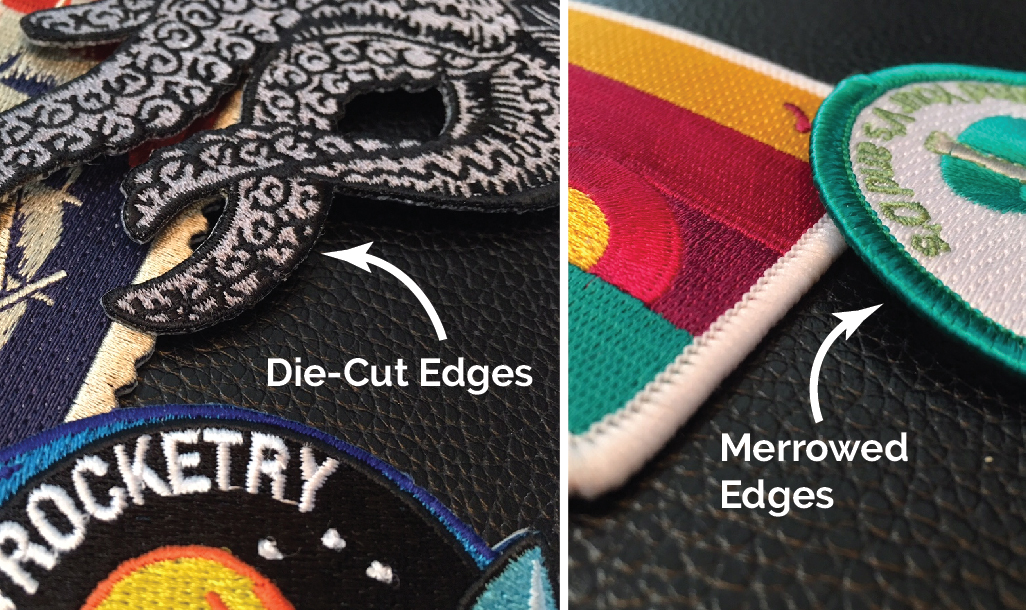
Embroidered patches have two border options: Merrowed and Die-Cut.
Merrowed borders wrap around the outside of the patch and are slightly raised. Merrowed borders are possible on designs that aren’t too complex. Squares, ovals, rockers, circles and similar shapes can have merrowed borders.
Die-cut borders can be used on simple shapes as well. But, they are usually used on complex shapes. If your design has a piece that protrudes out or has complex edges, it will most likely need to have a die-cut edge. There is no price difference between the two options.
Backing Options
There are a variety of backing options available for embroidered patches. If you’re looking to save a little money, the plastic backing option is included in our orders for free. For an additional small per-patch fee, you can also have iron-on, adhesive, hook and loop (one or two sides), pin back, or magnetic backings. You can also choose to have no backing at all.
Thread Colors
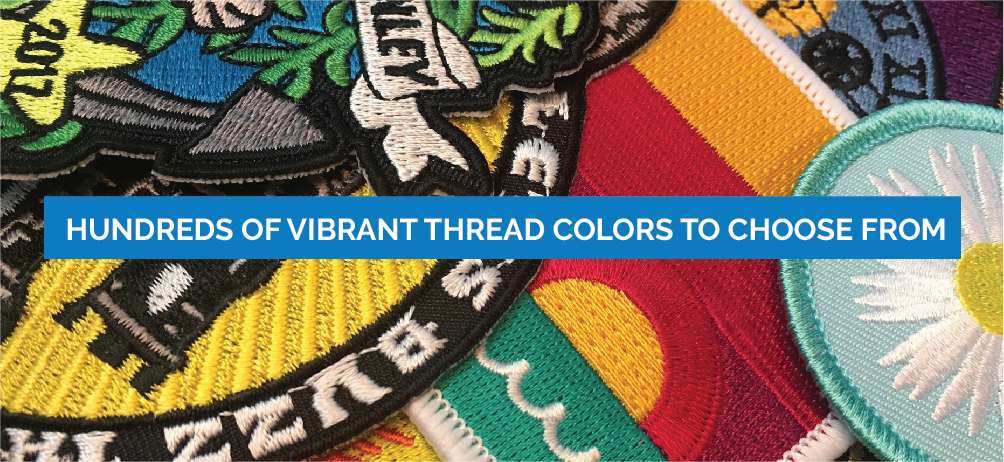
We have hundreds of vibrant thread colors to choose from. Your first 10 thread colors are included for free with your order, and additional colors are available for a small per-patch fee. If your patch is less than 100% embroidery, you can also select the color of your twill. The twill does not count towards your total thread count. You don't have to select thread colors yourself, though; our expert team can pick the closest match for you. With so many colors to choose from, we will most certainly have a thread to closely match each color in your design.
Designing your first patch
Not a designer? Jump past this sectionSo now that you are familiar with your options, let’s talk about your design! Embroidery can be really beautiful, but it does have limitations. Designing your patch in a smart way will ensure that your patch is recognizable, readable, and beautiful. It's also important not to load up your patch design with too many elements. Unless your patch is huge, having many tiny elements on a single design will usually make it look cluttered. This also gives less space for details. Consider which parts of your design are the most important and focus on those instead of giving less attention to several elements. We also have a team of talented artists to help you out with design as well.
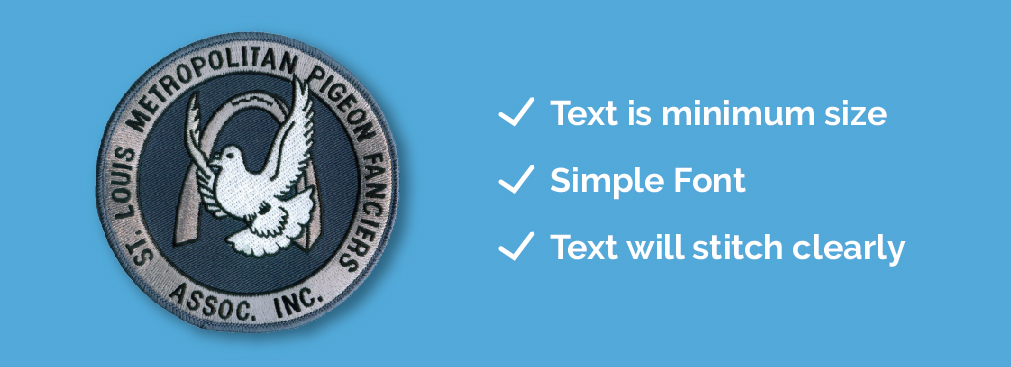
Text size
We recommend that any text on an embroidered patch be at least 0.25” high. With text that is at the minimum size, your font choice needs to be something simple. Myriad, Helvetica, or Arial are all great font choices for minimum size text. Text with embellishment, script, or very thin lines will usually not stitch well at small sizes.
If your design has small text, you can also enlarge the size of your patch to accommodate the stitching, or you can also switch the process to a woven patch instead. These types of patches have a completely different look from embroidered ones, but they allow for much smaller text and details
Choosing Colors
We offer up to 10 thread colors for free, but sometimes designs packed full of color will go well-over 10. If you don’t want to pay the additional fee for 11+ colors, consider combining similar colors. For example, if you have 2 different yellows, you can eliminate one and make them both the same. Make sure to pick colors with enough contrast to make your patch readable. Depending on the situation, sometimes using fewer colors can make a more striking design than one will many colors.
Patch Design
Coming up with an interesting or unique design can sometimes be difficult. Try taking a look at our patch gallery for some inspiration. It might be tempting to add several different elements to your patch, but that isn't always beneficial to the design. Simple designs can have lots of impact!
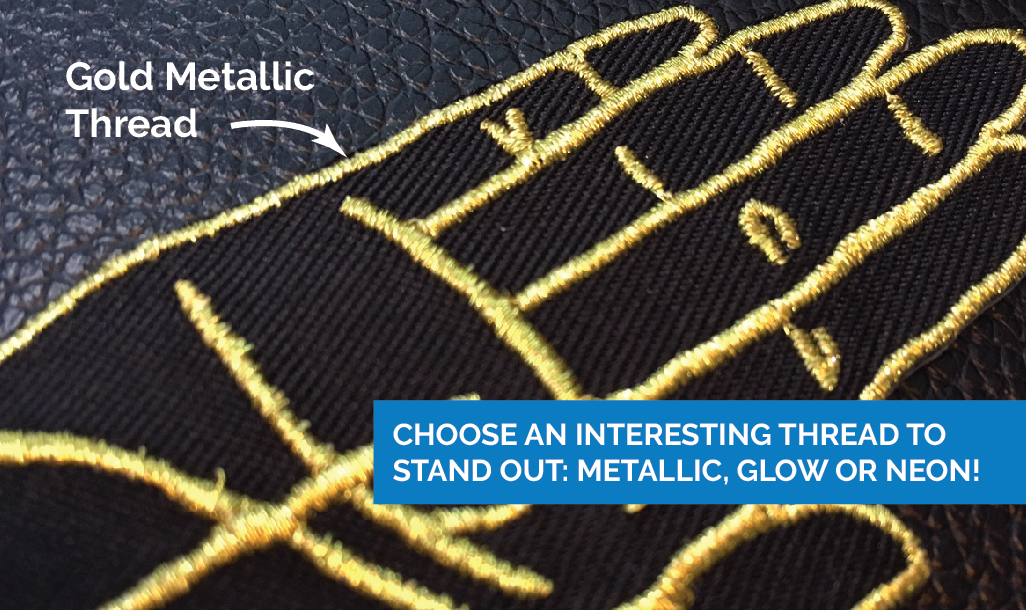
We can also blend colors to make beautiful gradients, and stitch in different directions to create beautiful textures. There are also some unique-looking threads available: glow-in-the-dark, metallic, and neon!
What if I’m not a designer or artist?
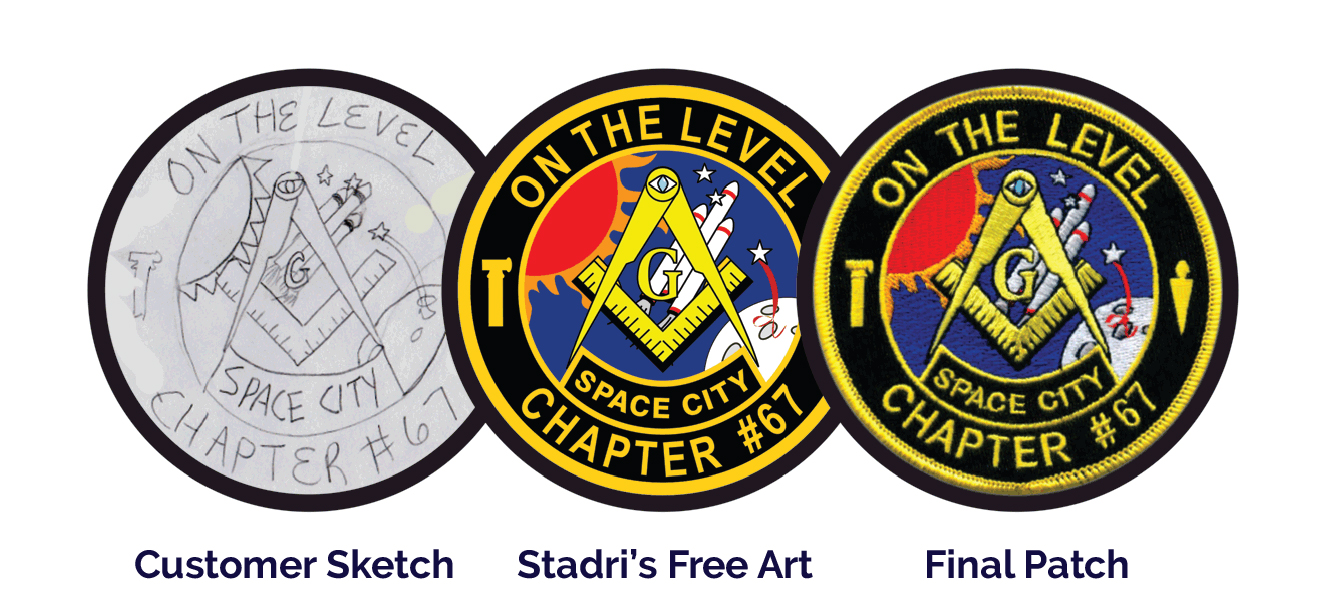
Don’t worry; all of our orders come with artwork set-up for free. Whether your design just needs some small tweaks or you only have a napkin drawing, we have you covered. If you don’t have finished art, here are a few tips for describing what you are envisioning to your artist:
1. Be as descriptive as possible! If there are any details that are important to you, let us know!
2. Feel free to send us photos or examples to help the artists know what you’d like.
3. Make a rough sketch, if possible. Even if it’s not very detailed, having a sketch can be really helpful to our artists.
The Order Process
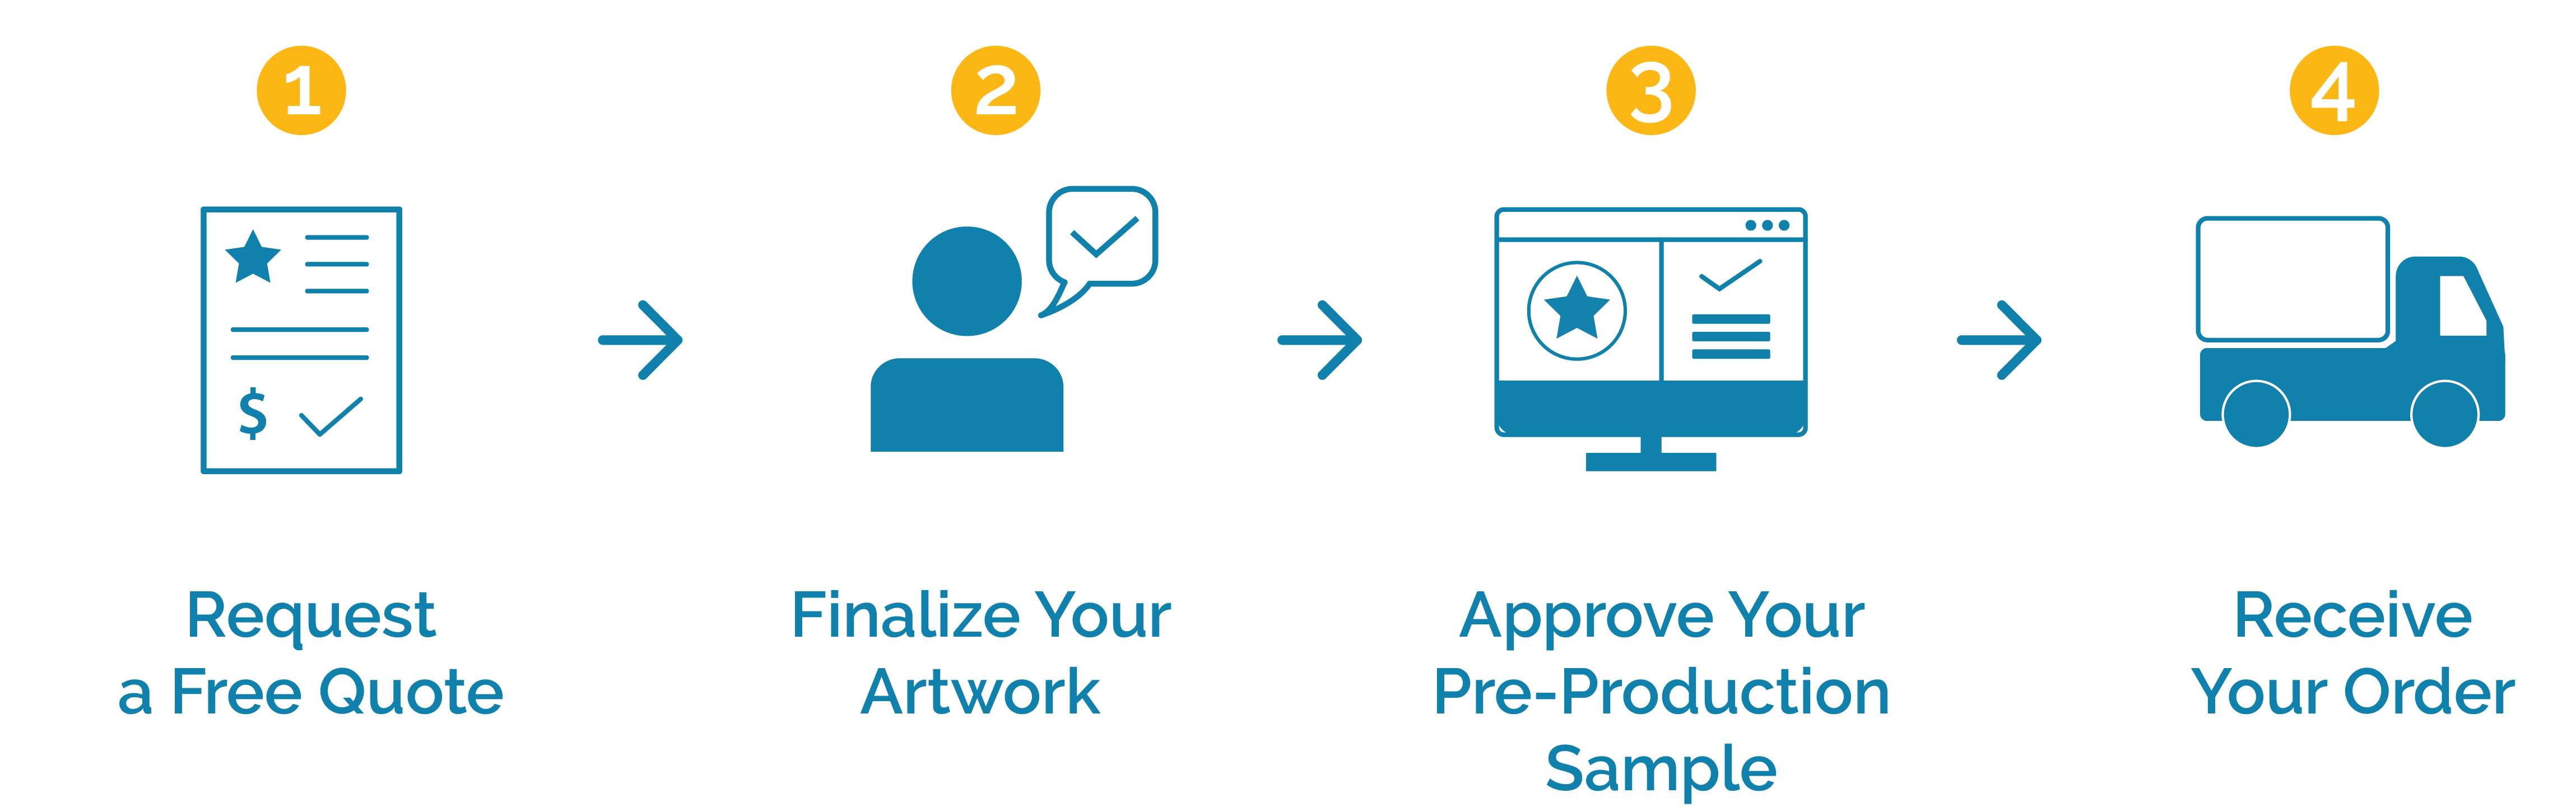
Once you have an idea of what you want, you can start the order process. Our process is fairly simple, but let’s go through it step by step.
- One you get a free quote through our website, you will be assigned a dedicated account manager. Your account manager will be able to advise you on pricing and help you decide if you are unsure which product you want. If you need assistance with artwork, you will have direct access to your assigned artist.
- Your artist will send you a digital rendition of your patch for your approval. Once you are satisfied with your artwork, we will then move on to the next step. If you have finished artwork, we will inspect it to make sure it will stitch properly before we move on.
- The next step is for you to approve a sewn sample. We will send you a photo of a single sewn sample for your approval. At this step, most patch samples look great and we proceed to full production. However, sometimes small adjustments, like color changes, need to be made. You will have this opportunity to make small changes to your patch if necessary.
- It usually takes about 2-3 weeks for us to complete an order and ship it to you. Rush services are available as well.
Hopefully, this cleared up some questions you might have had about making custom embroidered patches! Leave us a comment, or send us an email if you need any more information. If you're ready to make your first patch, get a free quote from Stadri.